This article explains how to install Visual Studio 2019 Preview in a step by step way.
We can learn about a new feature of Visual Studio 2019 through this link.
New Features
Visual Studio 2019 Highlights on Develop, Collaboration, Debug, Azure, Technologies.
We can know about the new features of Visual Studio 2019 Preview in here.
Steps for installing Visual Studio 2019 Preview
Step 1 : Using this link we are downloading Visual Studio 2019 Preview.

Step 2 : Click the "Download" button for downloading the VS 2019 executable file.

Step 3: Find downloaded "vs_enterprise__1653779055.1544460128.exe". Open it and click on continue button for downloading.


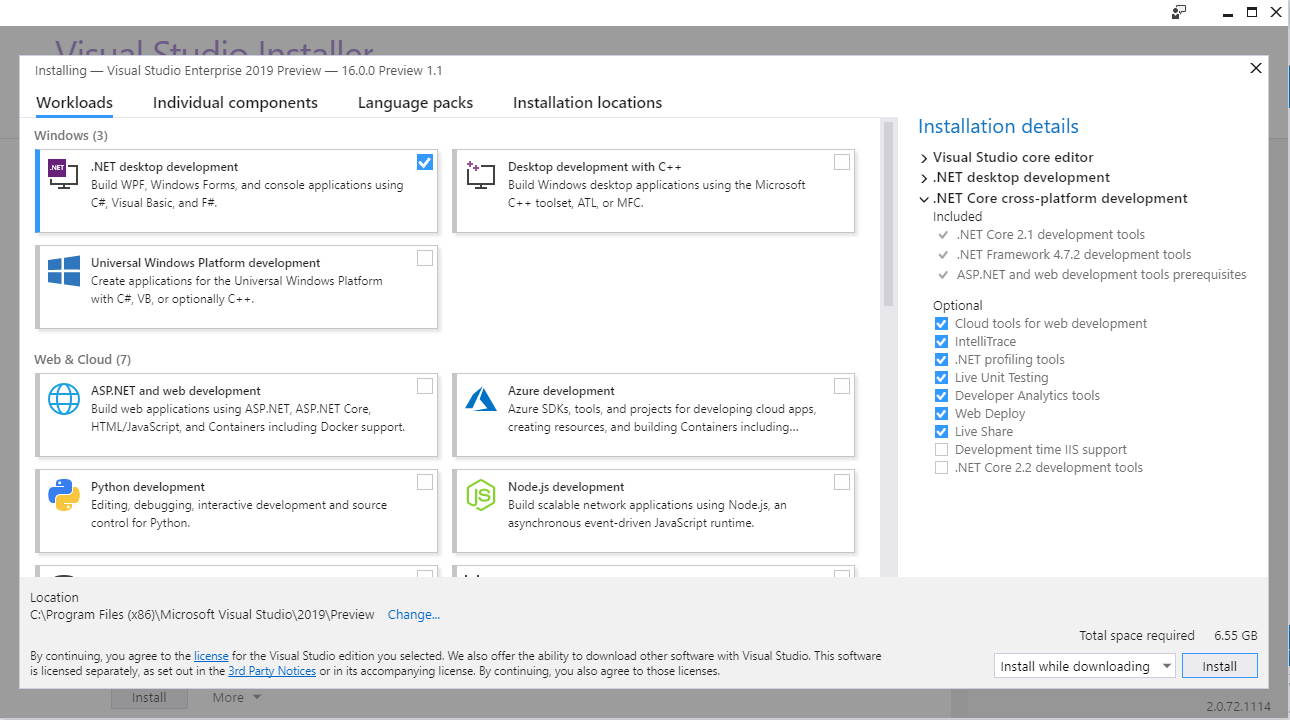
Step 4 : After completing the download and installation, then workloads will open.
We need to select what are the workloads we need. Here, we selected ASP.NET and web development, .NET Core cross-platform development.
After selecting the workloads, we can see the size of memory for installing the workloads based on our selections and see the installation details in the right side panel.
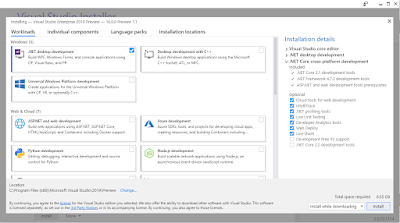
Step 5 : Click the "Install" button after selecting the workloads.
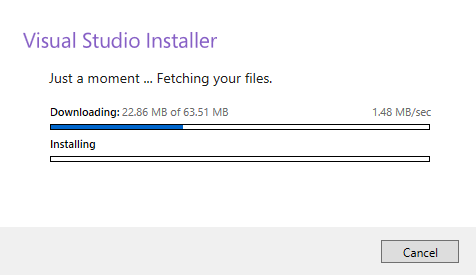
Now, the installation will start and you can see the progress bar for downloading and installing the package.

After completing the installation successfully, we can see that it looks like below. Click the “Lunch” button.

Now, The Visual studio 2019 Preview is installed in you computer. now you can start development using it and enjoying new features of it.
We can learn about a new feature of Visual Studio 2019 through this link.
New Features
Visual Studio 2019 Highlights on Develop, Collaboration, Debug, Azure, Technologies.
We can know about the new features of Visual Studio 2019 Preview in here.
Steps for installing Visual Studio 2019 Preview
Step 1 : Using this link we are downloading Visual Studio 2019 Preview.

Step 2 : Click the "Download" button for downloading the VS 2019 executable file.

Step 3: Find downloaded "vs_enterprise__1653779055.1544460128.exe". Open it and click on continue button for downloading.

Step 4 : After completing the download and installation, then workloads will open.
We need to select what are the workloads we need. Here, we selected ASP.NET and web development, .NET Core cross-platform development.
After selecting the workloads, we can see the size of memory for installing the workloads based on our selections and see the installation details in the right side panel.
Step 5 : Click the "Install" button after selecting the workloads.
Now, the installation will start and you can see the progress bar for downloading and installing the package.

After completing the installation successfully, we can see that it looks like below. Click the “Lunch” button.

Now, The Visual studio 2019 Preview is installed in you computer. now you can start development using it and enjoying new features of it.
Comments
Post a Comment